
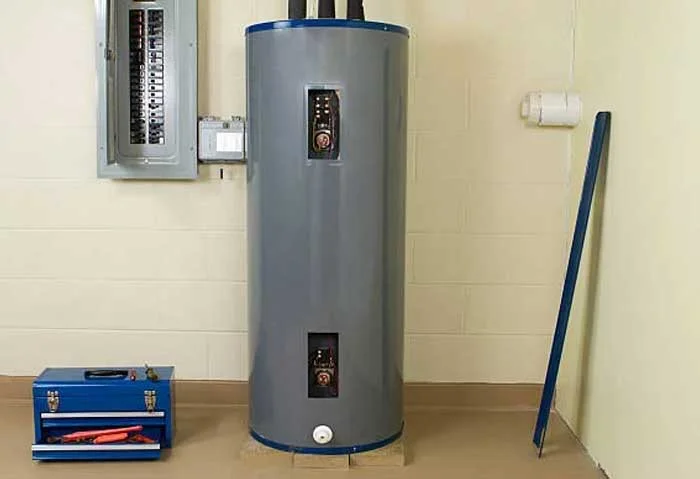
Get the best Electric Water Heater troubleshooting ideas from the professionals at Fixitxpress when your electric water heater isn’t working. We offer safe, sensible, and easy-to-follow steps for determining what’s flawed when your water heater is on the fritz.
What’s Conserving My Electric Water Heater From Getting Sizzling?
A selection of points might be responsible when your electric water heater isn’t heating.
- You would have difficulty together with your energy provider or a break within the wiring.
- One of many two heating components might be damaged, inflicting your scorching Water to expire sooner than it ought to.
- Your water heater might have a damaged thermostat.
Make sure your electric water heater is getting electric power.
The very first thing to test is the ability to supply. An electrical water heater wants 240 volts of energy to warm Water.
Test each home circuit breaker for the water heater. It’s typically arduous to identify a tripwire. We advocate that you just shut off each breaker for the water heater, after which you flip them back on.
If a breaker is tripped, it will reset it. Tripping may seemingly restore energy, except you might have an issue with {the electrical} provide itself, which ought to be addressed by a professional electrician.
If you reset the circuit breakers, they usually instantly journey once more. You seemingly have a damaged and shorted heating factor. Skip right down to the part titled “Check for a Quick Circuit” to troubleshoot the water heater.
If your circuit breakers don’t journey properly after resetting them, wait for a half-hour in your water heater to recuperate and test for warm Water.
Reset the excessive temperature in your electric water heater.
If you’re not getting any scorching water, you may reset the high-temperature restriction change on the higher thermostat. You get any scorching water if that restriction is tripped.
- Shut off the home circuit breakers in your water heater.
- Take away the higher heating factor cowl to enter the high-temperature restrict change.
- Press the pink button on the change to reset it, then reinstall the duvet.
Flip the circuit breakers again on and test to see if the water heater is usually heating.
Even when resetting the restriction change solves your downside, you are probably not out of the woods. You’ll want to watch your water temperature for overheating. The high-temperature restrict change tripped for a purpose, seemingly because you might have a shorted heating factor or faulty thermostat inflicting the Water to overheat.
You’ll resolve overheating issues to forestall scalding. Water temperature ought to by no means exceed 120 levels. If the Water overheats after resetting the high-temperature restrict change, observe the DIY troubleshooting recommendation in our Water too hot: electric water heater troubleshooting video to resolve that downside.
Test the Energy Provide Wiring
Up to now, we’ve proven to reset the circuit breakers and reset the high-temperature restriction change on the water heater. If you’re not getting any scorching water, we’ll test the ability to provide wiring.
Shut off the home circuit breakers in your water heater. Ensure you minimize off the right circuit breakers for the water heater. If the ability is linked, it might shock or kill you when checking to provide wiring.
Take away the duvet to the junction field that homes the ability to provide wiring. Make it possible for not one of the wires to be unfastened, and all wire nuts are tight sufficient to make safe connections. Reconnect any unfastened wires, then reinstall the duvet. Activate the home circuit breakers and test to see if you’re getting any scorching water now.
Check For a Quick Circuit
If that doesn’t clear up the issue, we’ll test the heating system inside your water heater. For this check, we’ll be utilizing a multimeter to test for continuity, which can affirm that energy is making it to all the inner parts.
Shut off the home circuit breaker for the water heater earlier than performing these checks. By no means try and test continuity with the ability linked.
First, test for a brief circuit to the water heater cupboard. (You’ll wish to test this, particularly if your circuit breaker journeys as quickly as you reset it.)
Entry the ability to provide wiring once more and observe these steps to test for a brief circuit:
- With the home circuit breaker for the water heater shut off, take away the wire nuts to enter the water heater provides wires.
- Set the multimeter to measure ohms of resistance.
- Measure the resistance from the black wire to the naked metallic on the junction field.
- Repeat the identical check with the pink wire.
Your meter should measure infinite resistance (no continuity) throughout these brief circuit checks, indicating that the electrical present doesn’t have a brief circuit path to the metallic contained in the water heater.
Suppose you measure a resistance studying throughout this check. In that case, broken wiring or a damaged electrical half is touching metallic contained in the water heater cupboard and inflicting the brief circuit.
Don’t restore energy to the water heater till you discover and restore the broken wire or the damaged electrical half. A brief circuit can shock you if you contact the metallic cupboard with the ability linked.
Test the Higher Heating System
The higher-factor heating system consists of the following:
- Temperature restricts change.
- Higher thermostat.
- Higher heating factor.
- Wires that join {the electrical} components within the higher heating system.
Test the higher factor heating system by measuring the resistance by the availability of wiring.
Since all of those parts create a whole circuit, if we don’t have continuity by the availability of wiring, we’ll know that the issue is within the higher half of the water heater.
To measure resistance by the availability of wiring, connect the one-meter probe to the black wire and the opposite probe to the pink wire.
You need to measure around 13 ohms of resistance by the higher factor heating system. If you measure 13 ohms of resistance, your higher factor heating system might be okay. Skip forward and test the decreased heating factor system if the higher system is okay.
If you don’t discover continuity by the higher heating system, test the person’s components to find the break.
With the energy nonetheless disconnected, remove the higher heating factor cowl and test the resistance for the higher heating factor. Place a one-meter lead on every one of the 2 screws. You need to measure about 13 ohms of resistance.
If you measure no continuity, drain the tank and change the damaged heating factor. Our Replacing a Heating Element video shows how to set up the replacement part.
If the heating factor is okay, test the higher thermostat subsequently.
The thermostat turns the higher heating factor on and off to keep up the scorching water temperature. An “electrical} change contained in the thermostat prompts the factor. If the change is damaged, the factor gains warmth.
At room temperature, the change ought to be on to provide energy to the heating factor. Discuss with a wiring diagram in your water heater to find out which terminals to test. Many water heaters have a sticker on the cupboard, or you may normally discover one in your proprietor’s handbook.
On the water heater proven within the video, the thermostat is between terminals 1 and a couple of. Contact the one-meter probe to terminal 1 and the opposite probe to terminal 2.
You need to measure close to zero ohms of resistance. In case you measure no continuity, then change the thermostat.
The final element within the higher factor heating system to test is the hi-temperature restrict change.
The wiring diagram proven in the video signifies that the hi-temperature restrict change opens contacts between terminals 1 & 2 and between terminals 3 & 4 when it journeys because the Water is too scorching.
Contact the one-meter probe to terminal 1 and the opposite probe to terminal 2. You need to measure close to zero ohms of resistance. Repeat that course for terminals 3 and 4.
If you measure no continuity, then the high-temperature restriction change is damaged. You’ll want to exchange the entire higher thermostat due to the restriction of changing a part of the thermostat.
Suppose you’ve checked all the higher heating system components and haven’t discovered the break. In that case, it’s acquired to be within the wiring. Rigorously look at the wiring for unfastened connections. Reconnect any unfastened wires and restore any damaged wires that you just discovered.
Test the Decrease Heating System
If the water heater’s higher heating system is okay, test the decreased heating system.
In keeping with the wiring diagram proven within the video, you may test continuity by the whole decrease heating system circuit by measuring resistance by terminal 4 on the higher thermostat, and terminal 4 on the high-temperature restrict change.
Contact one-meter probe to terminal 4 on the higher thermostat, and the opposite meter probe to terminal 4 of the high-temperature restrict change.
You need to measure about 13 ohms of resistance by the entire decrease factor heating system; that permits you to know all decrease heating system parts are working.
You’ve now eradicated all attainable failures. The higher thermostat has a switch that alternates energy between the higher heating factor and the decreased heating factor, so each heating component within the tank is by no means warm at a similar time.
When the higher thermostat senses that Water within the prime of the tank is scorching sufficient, the switch change shifts energy from the higher system to the decrease. If the switch within the higher thermostat breaks, the decreased heating factor gains energy.
You’ll want to exchange the entire higher thermostat due to the switch change as an element of that half.
Now, if, then again, you measured an open circuit when checking the decrease factor heating system, then you definitely must test the personal components of that system.
The decreased heating system is much like the higher one; it has a thermostat and a heating factor. Test the decreased heating factor first.
With the ability disconnected, entry the decreased heating factor to test continuity. You need to measure about 13 ohms of resistance. If you measure an open circuit, drain the tank and change the heating factor.
If the heating factor is okay, test the thermostat.
On the decreased thermostat, there are solely two terminals. Put the meter probes on both faucets. You need to measure close to zero ohms of resistance. In case you measure an open circuit, then change the thermostat.
Test For Breaks Within the Wiring
In case you can’t discover any breaks within the decreased heating system. The issue has been acquired to be within the wiring. You’ll restore it earlier, and the water heater will work accurately.
You’ll seemingly be capable of discovering the reason for your electric water heater failure utilizing this detailed DIY troubleshooting.
In case you get to some extent the place, it’s essential to have a Sears Technician go to your property and repair the water heater and schedule service. We’ll ship a tech proper out. Our skilled water heater specialists can repair the issue very quickly.
More information is available in An expert guide for Water Heater Installation, Repair, and Service.
Also, Read